THE ERASER
On the "Background" layer, left-clicking causes the Eraser to replace the current color with the background color, and right-clicking causes the Eraser to replace the current color with the foreground color. The following exercise illustrates:
Erasing on the Background Layer
- Open a new file.
File > New
Settings:
Width: 100 Pixels
Height: 100 Pixels
Resolution: 72 Pixels/inch
Background Color: White
Image Type: 16.7 Million Colors
- Check your grid preferences. They should be set as shown here.
File > Preferences > General Program Preferences > Rulers and Units
Settings:
Units: Pixels
Horizontal Spacing: 20
Vertical Spacing: 20
- Turn on the grid, if it is not already on.
View > Grid
- Set your foreground color to black:
Settings:
Red: 0
Green: 0
Blue: 0
- Set your background color to white.
Settings:
Red: 255
Green: 255
Blue: 255
- Zoom in on the image.
View > Zoom In By 1
- Select the Flood Fill tool
 .
Set the tool options.
Flood Fill Tab Settings:
Fill Style: Solid Color
Blend Mode: Normal
Paper Texture: None
Match Mode: None
Opacity: 100
Sample Merged: Yes
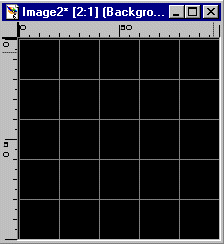
- Left-click anywhere on the image. Your image should now look like the one shown here.

Erasing a Column
- Select the Eraser tool
 .
Set the tool options.
Eraser Tab Settings:
Brush Type: Normal
Shape: Square
Size: 20
Hardness: 100
Opacity: 100
Step: 25
Density: 100
Eraser Options:
Paper Texture: None
Built Up Brush: Yes
- Left-click in the first block of the first column.
- Press and hold down the Shift key.
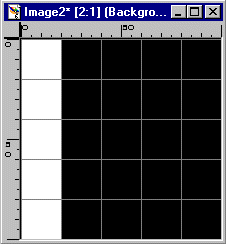
- Click in the last block in the first column. Your image should now look like the one shown here.

Erasing One Click at a Time
- Left-click once in each of the blocks in the third column.
Erasing by Dragging
- Left-click, hold, and drag the pointer down the fifth column.
- Turn off the grid.
View > Grid
- Close the file. Save the file if you like.
File > Close
Erasing on a Layer
On layers other than the "Background" layer, left-clicking makes the area on the current layer transparent, and right-clicking applies the foreground color to the area.
- Open boy.jpg in Paint Shop Pro.
File > Open
Look in: Enter the directory in which you stored your files.
File: boy.jpg
Files of Type: JPEG-JFIF Compliant (*.jpg, *.jif, *.jpeg)
- Add a new raster layer.
Layers > New Raster Layer
Settings:
Name: Color
Blend Mode: Normal
Opacity: 100
Groups: 0
Layer is Visible: Yes
Lock Transparency: No
Mask is Enabled for this Layer: Yes
Mask is Locked with Layer: Yes
- Set your foreground color to white:
Tool Settings:
Red: 255
Green: 255
Blue: 255
- Select the Flood Fill tool
 .
Set the tool options.
Flood Fill Tab Settings:
Fill Style: Solid Color
Blend Mode: Normal
Paper Texture: None
Match Mode: None
Opacity: 100
Sample Merged: Yes
- Left-click anywhere on the image. Your image should be completely white.
- Set the opacity for the layer to 50.
Layers > Properties
Setting:
Opacity: 50
- Select the Eraser tool.
- In the Tool Options dialog box, click on the Eraser tab, if it is not in the front.
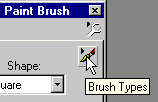
- Click on the Brush Types icon. A drop-down menu will appear.

- Click on Custom. The Custom Brush dialog box will appear.
- Select the star.
- Click on OK to close the dialog box.
- Click on the boy's face.
- Reset the opacity for the layer to 100.
Layers > Properties
Setting:
Opacity: 100
- Select the Crop tool
 .
. - Place a rectangle around the star, using the Crop tool.
- Crop the image.
Image > CropYour image should look like the one shown here.

- Do not save the image. You will use boy.jpg again in another exercise.
| Table of Contents |

