
Office 2010 has a new feature that you can use to remove a background from a photograph and then, if you wish, add a new one. This type of sophisticated photo editing was previously only possible with specialized photo-editing software.
With Office, you simply insert the picture into an Office document and then use the Background Removal option to remove the background. You can then create a new background by choosing a shape, as shown in the following example, or by using another picture as the background.
You create a shape by choosing the type of shape you want from the Shapes option in the Illustrations group on the Insert tab. After you create a shape, you can apply a style to it.
When you insert pictures or create objects such as shapes, Office stacks them in the order you place them in the document. Whether an object appears to be in front of or behind another object depends on the stacking order. You can change the stacking order by using the Send Forward and Send Backward options on the Format tab in the Arrange group. In the example that follows, we will create a new background by creating a rectangle shape and then placing it behind a picture from which the background has been removed.
Insert a Picture
A Document with the Cursor at the Insertion Point
- Place your cursor where you want to insert a picture.
- Activate the Insert tab.
- Click Picture in the Illustrations group. The Insert Picture dialog box appears.

The Insert Picture Dialog Box
- Locate the picture you want to insert and then click Insert. Office places the picture in your document and the Picture tools become available.
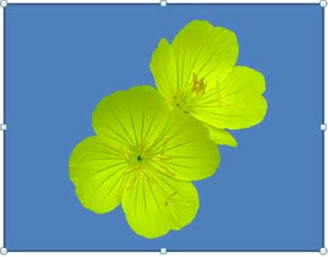
Picture in Document with the Picture Tools Available
Remove a Background
Picture in Document with the Picture Tools Available
- Click the picture. The Picture tools become available.
- Activate the Format tab.
- Click Background Removal in the Background Removal group. The picture appears with a bounding box surrounding everything that will be included in the final image and a purple tint on everything that will be removed from the image.
Picture with Bounding Box and Areas Marked for Removal
- Adjust the size of the bounding box to include everything you want included.
- Click the Mark to Include button and then click the image to include in the image anything Office wants to remove that you want to include. Office places a plus (+) sign on the picture (not applicable to this example).
- Click the Mark to Remove button and then click the image to remove anything in the image Office wants to include that you want to remove. Office places a minus sign (–) on the picture.
- Click Close Background Removal. Office removes the background.

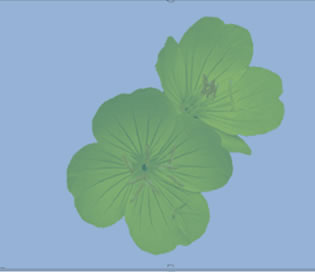
Picture with the Background Removed
![]() Note: If you change your mind about adding or removing a portion of the picture, click the Delete Marks button and then click the plus (+) or minus (–) sign that Office added.
Note: If you change your mind about adding or removing a portion of the picture, click the Delete Marks button and then click the plus (+) or minus (–) sign that Office added.
Add a New Background
Insert Tab Showing the Illustrations Group
- Activate the Insert tab.
- Click Shapes in the Illustrations group. A gallery of shapes appears.
Gallery of Shapes with the Rectangle Selected
- Choose the rectangle.
Area Where the Rectangle Will Be Drawn

The Rectangle with the Picture Behind It
- Click the upper-left corner of your picture; then drag to the lower-right corner and release the mouse. Office places a rectangle over your picture and the Drawing tools become available.
The Arrange Group on the Format Tab
The Picture with the Rectangle Behind It
- Activate the Drawing tools Format tab.
- Click Send Backward in the Arrange group. Office places the rectangle behind the picture.
The Shape Styles Group on the Format Tab
- Click the More button
 in the Shape Styles group. A gallery of styles appears. As you hover over each option, a live preview of the style appears.
Gallery of Styles
- Click the style you want. Office applies the style.

New Style Applied to the Rectangle
As it stands now, Office views the picture and the background as separate objects. If you move the picture, the rectangle does not move with it; if you move the rectangle, the picture does not move with it. To have Office view them as a single object, you must group them. You can then work with the picture and the rectangle as one object.
Note: These steps may not work in Word.
The Arrange Group on the Format Tab
- Click the picture. The Picture tools and/or the Drawing tools become available.
- Activate the Format tab for either the Picture tools or the Drawing tools; it does not matter which.
- Click Selection Pane in the Arrange group. The Selection and Visibility pane appears and all of the shapes in the worksheet appear in the pane. Office has named the objects.
The Selection and Visibility Pane
- In the Selection and Visibility pane, hold down the Ctrl key and click the picture’s name to select it. Then, while still holding down the Ctrl key, click the rectangle’s name to select it.
The Arrange Group on the Format Tab
- Activate the Format tab for either the Picture tools or the Drawing tools; it does not matter which.
- Click the Group button in the Arrange group. Office groups the rectangle and the picture. You can now work with them as one object.